

5 Easy Steps to Draw a Beautiful Lotus Flower
Are you looking for an easy way to draw a lotus flower? You’ve come to the right place!
I am always looking for easy ways to create great outlines and doodles that do not take a lot of time and effort to achieve. Flower doodles are my favorite!
Today, I will show you a foolproof way to draw a lotus flower that you can be proud of in five easy steps. Are you ready to get started?

This post may contain affiliate links. I earn a small commission from qualifying purchases made through the links provided in this post. Please read my full disclosure HERE.
If you would like to draw along, I encourage you to gather a couple of items you will need to draw your lotus flower.
Materials to Draw a Lotus Flower Outline:
Pencil and eraser
Choose one: Protractor, circle stencil, circle tracer, or even a cup!
Paper of your choice
Pen for final outline
That is all you need! Just a few simple items, and you are halfway there.
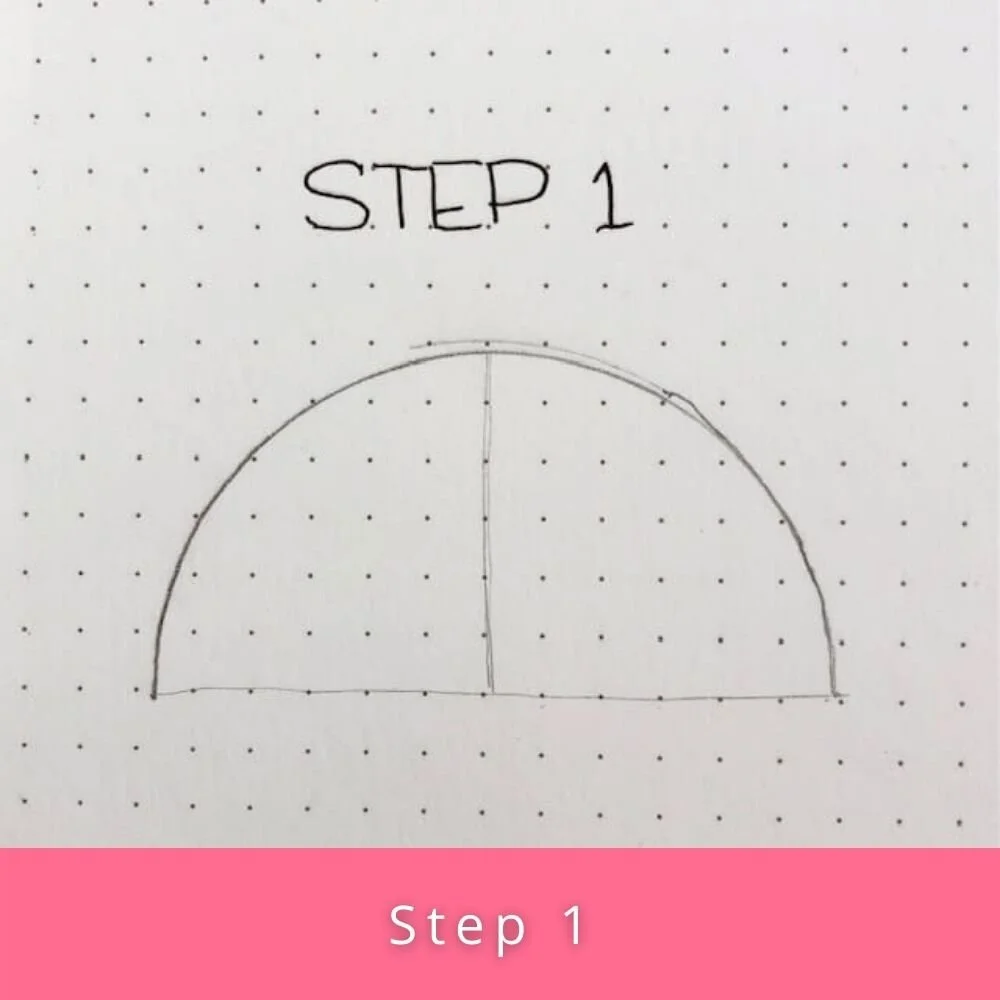
Step 1 - Draw a Guide
When drawing a lotus flower outline, the first thing you want to do is draw a guide for your petals to stay inside. A guide helps you see the flower size before you even draw a petal!
Use your choice of circle stencil or tracing object, and draw a half-circle on your paper. Then, draw a straight line to connect the two ends of the half-circle you drew. This will make a half-circle you will use to draw your lotus flower inside.

Step 2 - Drawing the First Center Petal
Find the middle of the straight line you created. Draw a line straight up the middle of your half circle.
Next, start at the top of the vertical line you drew and draw a line down that curves out like a football and comes back inward. The line will finish at the bottom point you made.
Repeat the same step on the opposite side to create your first petal!
(This should resemble an elongated football!)

Step 3 - Drawing Layers of Petals
Following step two, you will add petals next to the first center petal you created. You will use the same motions to create the petal shape. Draw the petals close enough together that they almost overlap. Once you reach the spot where you would overlap the petals, stop the line once the outline touches the center petal. See the picture above.
Repeat the same step on both sides of the lotus until you’ve filled your half circle.

Step 4 - Adding Dimensional Petals
Once the front petals are finished, you can add a few petals poking through the back to make the lotus more full.
In the open space between two petals, draw petal points to add a layer of dimension to your lotus. See the picture above.

Step 5 - Optional Dimension Petals
If you want to add a little more dimension to your lotus, add small petals at the front of your lotus by drawing them forward in the front of your illustration. See the picture above.
You do not have to add these petals if you like a simple lotus outline.
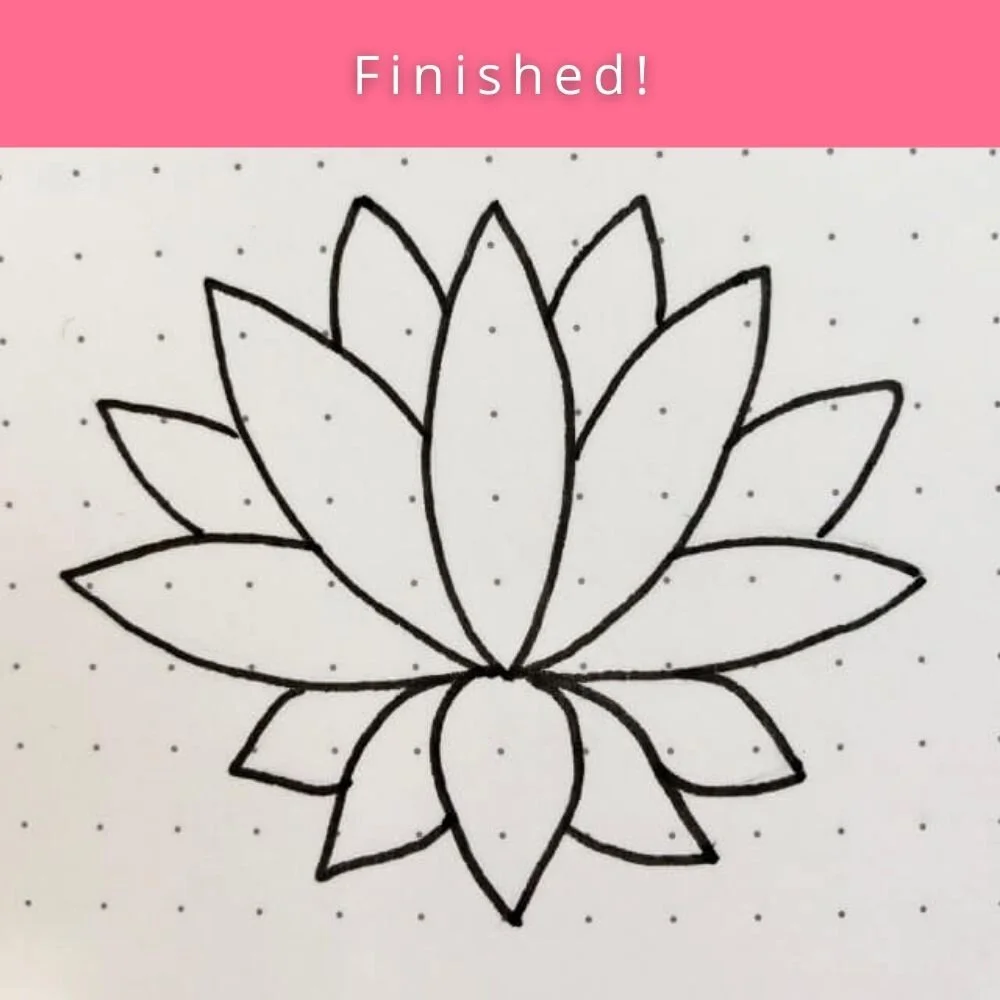
Finishing Your Lotus Flower Outline
Now that you have finished sketching your lotus flower outline, you can go over the pencil lines with a fine liner pen. Once the pen lines are dry, erase the pencil markings for a finished look!
Wrap Up - Lotus Flower Drawing

There you have it! A simple way to draw a lotus flower outline. From here, you can leave it exactly the way it is or add color or shading to make it really pop!
I hope you found this simple drawing tutorial helpful and easy to follow. I’d love to see how your lotus flowers turn out, so send me a message! My inbox is open for happy mail!
If you have other drawing tutorial requests, please send them my way. I would love to hear from you!
If you liked this post, you can find other doodles and drawing inspiration in these posts:


Happy doodling.
Holly